
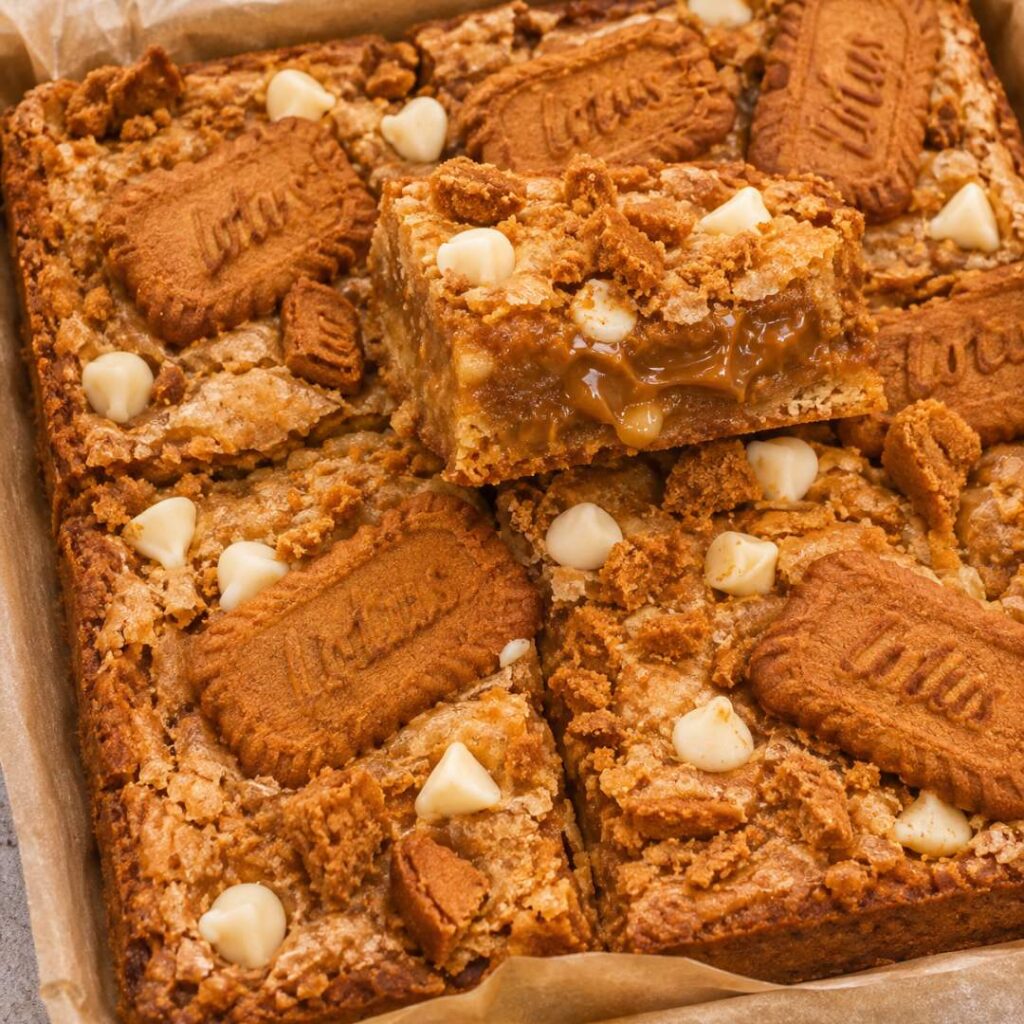
There’s something incredibly comforting about the smell of freshly baked cookies wafting through your home, isn’t there? When I think of cozy afternoons spent in the kitchen, making these stuffed Biscoff cookie bars always brings a smile to my face. They’re so easy to whip up and are sure to become a fast favorite in your household. Trust me, once you try them, you’ll be making these sweet treats on repeat!
Why You’ll Love Stuffed Biscoff Cookie Bars
- Fast: You can have the main components prepped and in the oven in about 20 minutes.
- Easy: It’s a simple “brown and bake” method that even beginner cooks can master.
- Giftable: This is a sturdy dish that travels well, making it perfect for potlucks or as a “get well soon” meal.
- Crowd-pleasing: Even people who think they don’t like Biscoff cookies usually fall in love with this rich, gooey version!
Ingredients
- 1 cup unsalted butter, softened: This is the base for our cookie bars, giving them that rich, buttery flavor.
- 1 cup brown sugar, packed: Brown sugar adds moisture and a hint of caramel flavor.
- 1/2 cup granulated sugar: This balances out the depth of the brown sugar.
- 2 large eggs: Eggs help bind everything together.
- 2 teaspoons vanilla extract: Because who doesn’t love a little vanilla in their dessert?
- 3 cups all-purpose flour: The foundation of any good cookie dough.
- 1 teaspoon baking soda: This helps the cookies rise and become fluffy.
- 1/2 teaspoon salt: A pinch of salt really enhances the sweetness.
- 1 cup Biscoff spread: The star of the show, adding that delectable cookie flavor.
- 1/2 cup crushed Biscoff cookies: For an extra crunch and flavor boost.
- Optional: additional Biscoff cookies for topping: Because more Biscoff is always a good idea!
How to Make Stuffed Biscoff Cookie Bars
- Preheat your oven to 350°F (175°C). Grease a 9×13 inch baking pan or line it with parchment paper.
- In a large bowl, cream together the softened butter, brown sugar, and granulated sugar until light and fluffy.
- Beat in the eggs, one at a time, then stir in the vanilla extract.
- In a separate bowl, whisk together the flour, baking soda, and salt.
- Gradually add the dry ingredients to the wet ingredients, mixing until just combined.
- Spread half of the cookie dough evenly in the prepared baking pan.
- Dollop the Biscoff spread over the cookie dough and spread it out gently. Sprinkle the crushed Biscoff cookies on top.
- Take the remaining cookie dough and drop spoonfuls over the Biscoff layer, spreading it gently to cover.
- If desired, place additional Biscoff cookies on top for decoration.
- Bake in the preheated oven for 25-30 minutes, or until the edges are golden and a toothpick inserted into the center comes out clean.
- Allow to cool in the pan for 10-15 minutes before transferring to a wire rack to cool completely.
- Cut into bars and enjoy!
Substitutions & Additions
If you’re looking to mix things up a bit, here are some ideas:
- Nut Butter: Swap the Biscoff spread for your favorite nut butter for a different flavor profile.
- Chocolate Chips: Toss in some chocolate chips for added sweetness and texture.
- Spices: Add a dash of cinnamon or nutmeg for a warm, spiced flavor.
Tips for Success
- Don’t overmix: Once you combine the wet and dry ingredients, mix just until combined to keep the bars soft.
- Let them cool: Give your cookie bars time to cool fully before cutting to ensure clean edges.
- Prep ahead: You can make the dough a day in advance and store it in the fridge until you’re ready to bake.
How to Store Stuffed Biscoff Cookie Bars
These cookie bars can be stored in an airtight container at room temperature for up to a week. If you want to keep them fresh for longer, consider freezing them. Just wrap them tightly in plastic wrap, then place them in a freezer-safe bag. They will last up to three months in the freezer!
FAQs
- Can I use salted butter instead of unsalted? Yes, but you may want to reduce the added salt in the recipe.
- Can I make these bars gluten-free? Absolutely! Just substitute the all-purpose flour with a gluten-free blend.
- How do I know when they are done baking? The edges should be golden brown and a toothpick should come out clean from the center.
These stuffed Biscoff cookie bars are truly a delight that you will want to share with friends and family. For more delicious recipes, check out my cookie recipes or easy dessert ideas for treats you will love!
If you enjoyed this recipe, don’t forget to follow our Pinterest for more delicious ideas!
Stuffed Biscoff Cookie Bars
Equipment
- 9×13-inch baking pan
- Large bowl
- Separate bowl
- Whisk
Ingredients
For the Cookie Bars
- 1 cup unsalted butter softened
- 1 cup brown sugar packed
- 1/2 cup granulated sugar
- 2 large eggs
- 2 teaspoons vanilla extract
- 3 cups all-purpose flour
- 1 teaspoon baking soda
- 1/2 teaspoon salt
- 1 cup Biscoff spread
- 1/2 cup crushed Biscoff cookies
- Optional: additional Biscoff cookies for topping
Instructions
- Step 1: Preheat your oven to 350°F (175°C). Grease a 9×13 inch baking pan or line it with parchment paper.
- Step 2: In a large bowl, cream together the softened butter, brown sugar, and granulated sugar until light and fluffy.
- Step 3: Beat in the eggs, one at a time, then stir in the vanilla extract.
- Step 4: In a separate bowl, whisk together the flour, baking soda, and salt.
- Step 5: Gradually add the dry ingredients to the wet ingredients, mixing until just combined.
- Step 6: Spread half of the cookie dough evenly in the prepared baking pan.
- Step 7: Dollop the Biscoff spread over the cookie dough and spread it out gently. Sprinkle the crushed Biscoff cookies on top.
- Step 8: Take the remaining cookie dough and drop spoonfuls over the Biscoff layer, spreading it gently to cover.
- Step 9: If desired, place additional Biscoff cookies on top for decoration.
- Step 10: Bake in the preheated oven for 25-30 minutes, or until the edges are golden and a toothpick inserted into the center comes out clean.
- Step 11: Allow to cool in the pan for 10-15 minutes before transferring to a wire rack to cool completely.
- Step 12: Cut into bars and enjoy!