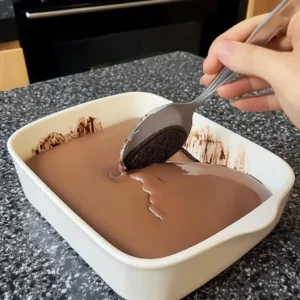
No-Bake Oreo Biscuit Cake
This delightful dessert is a quick and easy treat made with Oreo biscuits, creamy filling, and can be prepared in under 30 minutes. Perfect for any occasion!
Equipment
- food processor
- Mixing bowls
- Whisk
- Serving Dish
Ingredients
Oreo Biscuit Cake Ingredients
- 2 packs Oreo biscuits These will be the star of your cake!
- 1 cup milk For dipping the Oreos to soften them up.
- 1 cup whipped cream This adds lightness and fluffiness to your cake.
- 1/2 cup cream cheese For that rich and creamy texture.
- 1/4 cup powdered sugar To sweeten up the cream cheese mixture.
- 1 teaspoon vanilla extract For a lovely hint of flavor.
Optional Garnish
- chocolate shavings or crushed Oreos for garnish (optional)
Instructions
- Step 1: Start by crushing the Oreo biscuits into small pieces. You can use a food processor for a quick job, or if you prefer a bit of exercise, place them in a zip-lock bag and crush them with a rolling pin.
- Step 2: In a bowl, mix the cream cheese, powdered sugar, and vanilla extract until you get a smooth and creamy consistency.
- Step 3: In a separate bowl, whip the cream until it forms stiff peaks. This step is crucial for that airy texture we all love!
- Step 4: Gently fold the whipped cream into the cream cheese mixture until everything is well combined. Take your time here; you want to keep that fluffiness.
- Step 5: Dip each crushed Oreo biscuit into the milk for just a few seconds to soften them slightly. Don’t let them soak too long!
- Step 6: Layer the dipped Oreos in a serving dish, covering the bottom.
- Step 7: Spread a layer of the cream mixture over the Oreo biscuits.
- Step 8: Repeat the process, alternating layers of dipped Oreos and cream mixture until all ingredients are used, finishing with the cream layer on top.
- Step 9: Cover the dish and refrigerate the cake for at least 4 hours, or until set. This step is so important for the flavors to meld together.
- Step 10: Before serving, feel free to garnish with chocolate shavings or crushed Oreos for an extra touch. Then, cut into slices and enjoy your No-Bake Oreo Biscuit Cake!
Notes
Store any leftovers in an airtight container in the refrigerator for about 3-4 days. The flavors only get better as it sits!