
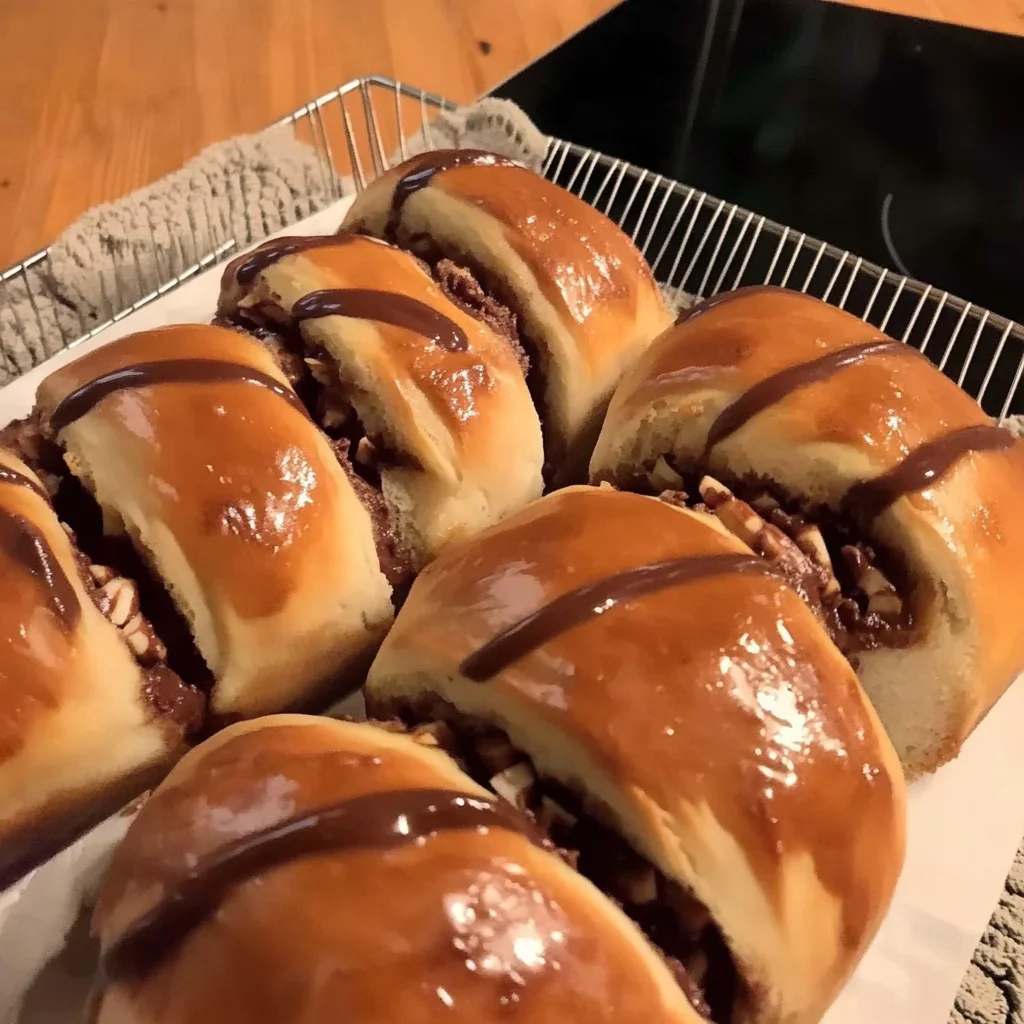
There’s something magical about the smell of freshly baked bread wafting through your home. It invokes warm memories, cozy gatherings, and perhaps a bit of childhood nostalgia. Today, I want to share with you an irresistible recipe for chocolate milk bread that is not only easy to make but also a treat for the senses. Imagine biting into a soft, chocolatey loaf that is perfect for breakfast, snacks, or even dessert. This recipe comes together quickly and will surely become a cherished favorite in your kitchen.
Why You’ll Love Chocolate Milk Bread
- Fast: You can have the main components prepped and in the oven in about 20 minutes.
- Easy: It’s a simple “brown and bake” method that even beginner cooks can master.
- Giftable: This is a sturdy dish that travels well, making it perfect for potlucks or as a “get well soon” meal.
- Crowd-pleasing: Even people who think they don’t like bread usually fall in love with this chocolatey version!
Ingredients
- 3 cups all-purpose flour: This is the base of our bread, providing the structure.
- 1/4 cup unsweetened cocoa powder: Adds that rich chocolate flavor we’re all craving.
- 1/4 cup granulated sugar: Just the right amount of sweetness to complement the cocoa.
- 1 teaspoon salt: Enhances the flavors in the bread.
- 2 teaspoons instant yeast: Helps the bread rise beautifully.
- 1 cup warm chocolate milk (110°F/43°C): The star ingredient that gives this bread its unique flavor and moisture.
- 1/4 cup unsalted butter, melted: Adds richness and a lovely texture.
- 1 large egg: Helps bind everything together for a perfect loaf.
How to Make Chocolate Milk Bread
Now, let’s get our hands a little messy and make some chocolate milk bread!
- In a large mixing bowl, combine the all-purpose flour, cocoa powder, sugar, salt, and instant yeast. Mix well to ensure everything is evenly distributed.
- In a separate bowl, whisk together the warm chocolate milk, melted butter, and egg until fully combined.
- Gradually add the wet ingredients to the dry ingredients, mixing until a dough forms. You’ll see how beautifully the chocolate color comes together!
- Knead the dough on a floured surface for about 10 minutes, or until it becomes smooth and elastic. This is where you can really get into it, feel the dough transform under your hands.
- Place the dough in a greased bowl, cover with a clean kitchen towel, and let it rise in a warm place for about 1 hour, or until it has doubled in size.
- Preheat your oven to 350°F (175°C) while the dough rises so it’s ready to go when you are.
- Once the dough has risen, punch it down (yes, really!) and shape it into a loaf. Place the loaf in a greased bread pan.
- Cover the loaf again and let it rise for another 30 minutes. This second rise is what makes the bread light and fluffy.
- Bake in the preheated oven for 30-35 minutes, or until the bread sounds hollow when tapped on the bottom. Your kitchen will smell heavenly by now!
- Remove from the oven and allow to cool in the pan for 10 minutes before transferring to a wire rack to cool completely. Try to resist the urge to slice into it immediately!
Substitutions & Additions
If you want to play around with the recipe, here are some great ideas:
- Use whole wheat flour for a healthier option, though it may change the texture slightly.
- Swap out chocolate milk for regular milk and add a bit more cocoa powder if you prefer.
- Add chocolate chips to the dough for extra chocolatey goodness.
- Try adding nuts or dried fruits for a delightful twist!
Tips for Success
To ensure your chocolate milk bread turns out perfectly every time, keep these tips in mind:
- Make sure your ingredients are fresh, especially the yeast, as it is crucial for rising.
- Don’t rush the rising time; it’s essential for a soft texture.
- If your kitchen is cold, you can turn on the oven for a minute, then turn it off and place the dough inside to rise.
- Feel free to experiment with the baking time, as every oven can vary.
How to Store Chocolate Milk Bread
Once your bread is cool, you can store it in an airtight container at room temperature for up to 3 days. For longer storage, wrap it tightly in plastic wrap and freeze for up to 3 months. Just remember to thaw it before enjoying!
FAQs
Can I use regular milk instead of chocolate milk? Yes, but you may want to add a bit more cocoa powder for that rich flavor.
Can I make this bread ahead of time? Absolutely! You can prepare the dough a day in advance and keep it in the refrigerator overnight.
What can I serve with chocolate milk bread? It pairs beautifully with butter, jam, or even ice cream for a delightful dessert.
Can I use a bread machine for this recipe? Yes, you can use a bread machine, just follow the manufacturer’s instructions for adding ingredients.
So there you have it, a delightful recipe for chocolate milk bread that is sure to impress your family and friends. For more delicious recipes, check out easy baking ideas or sweet treats for treats you will love!
And don’t forget to follow us on Pinterest for more inspiration and delicious recipes to try!
Chocolate Milk Bread
Equipment
- Large Mixing Bowl
- Bread Pan
- Floured Surface
Ingredients
For the Chocolate Milk Bread
- 3 cups all-purpose flour provides the structure
- 1/4 cup unsweetened cocoa powder adds rich chocolate flavor
- 1/4 cup granulated sugar for sweetness
- 1 teaspoon salt enhances flavor
- 2 teaspoons instant yeast
- 1 cup warm chocolate milk at 110°F/43°C
- 1/4 cup unsalted butter melted for richness
- 1 large egg binds the mixture
Instructions
- Step 1: In a large mixing bowl, combine the all-purpose flour, cocoa powder, sugar, salt, and instant yeast. Mix well to ensure everything is evenly distributed.
- Step 2: In a separate bowl, whisk together the warm chocolate milk, melted butter, and egg until fully combined.
- Step 3: Gradually add the wet ingredients to the dry ingredients, mixing until a dough forms.
- Step 4: Knead the dough on a floured surface for about 10 minutes, or until it becomes smooth and elastic.
- Step 5: Place the dough in a greased bowl, cover with a clean kitchen towel, and let it rise in a warm place for about 1 hour, or until doubled in size.
- Step 6: Preheat your oven to 350°F (175°C) while the dough rises.
- Step 7: Once the dough has risen, punch it down and shape it into a loaf. Place the loaf in a greased bread pan.
- Step 8: Cover the loaf again and let it rise for another 30 minutes.
- Step 9: Bake in the preheated oven for 30-35 minutes, or until the bread sounds hollow when tapped on the bottom.
- Step 10: Remove from the oven and allow to cool in the pan for 10 minutes before transferring to a wire rack to cool completely.