
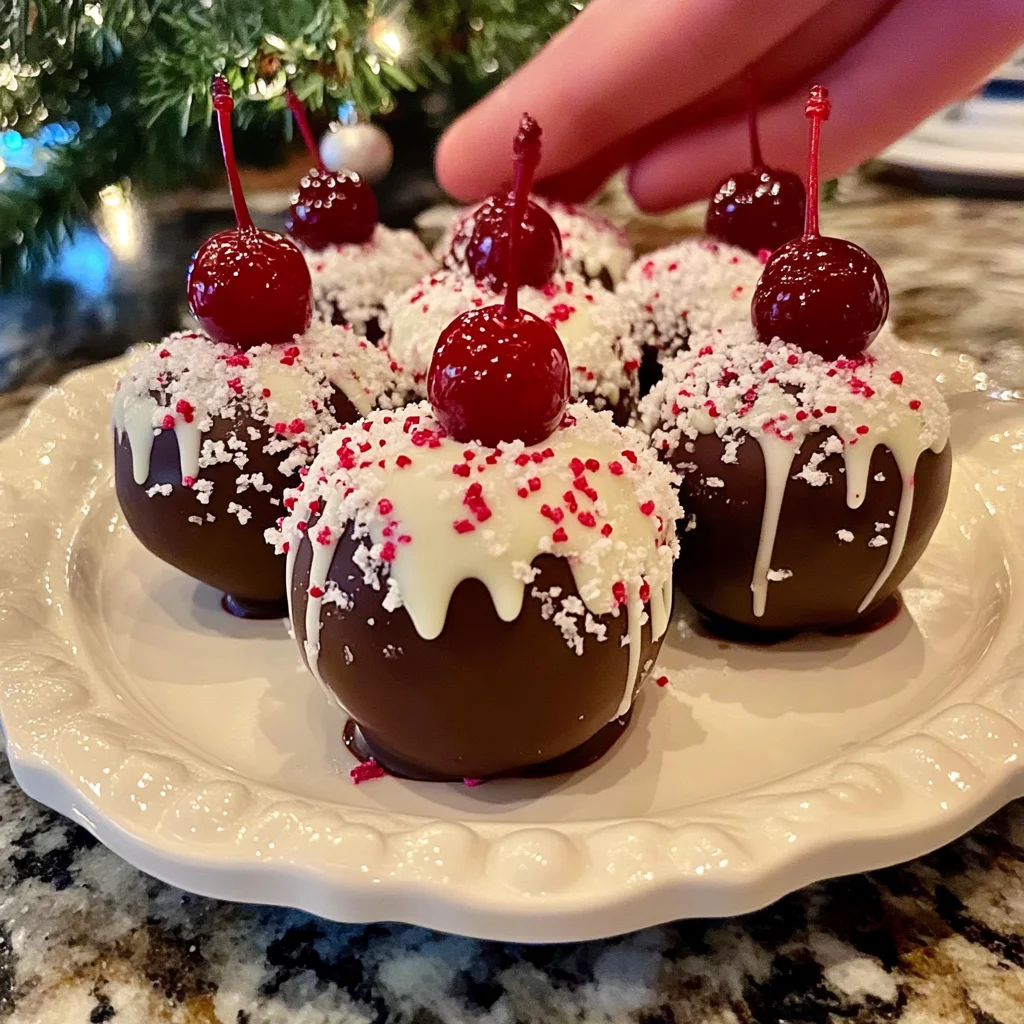
There’s something so magical about the holiday season, isn’t there? The twinkling lights, the sweet sounds of carols, and the delightful aroma of treats baking in the oven. One memory that always brings a smile to my face is making Christmas Chocolate Cherry Balls with my family. These little bites of joy are not only easy and quick to whip up, but they also capture the essence of holiday indulgence. Let’s dive in and create these festive delights together!
Why You’ll Love Christmas Chocolate Cherry Balls
- Fast: You can have the main components prepped and ready to go in about 20 minutes.
- Easy: This simple no-bake recipe is perfect for cooks of all levels.
- Giftable: These chocolate cherry balls make a beautiful and tasty gift for friends and family.
- Crowd-pleasing: Everyone loves a sweet treat, and these chocolate cherry balls are sure to impress!
Ingredients
- 1 cup dried cherries, chopped – These add a lovely tartness that balances the sweetness.
- 1 cup chocolate wafer crumbs – A crunchy base that brings a nice texture.
- 1 cup powdered sugar – For sweetness and a smooth consistency.
- 1/2 cup unsweetened cocoa powder – Rich chocolate flavor without added sweetness.
- 1/4 cup unsalted butter, melted – This binds everything together beautifully.
- 1 teaspoon vanilla extract – A must for that warm, inviting flavor.
- 1/2 cup chocolate chips, melted (for coating) – The perfect outer layer!
- 1/4 cup sprinkles or chopped nuts (for decoration) – For that festive touch.
How to Make Christmas Chocolate Cherry Balls
Ready to create these delightful treats? Let’s get started!
- In a large mixing bowl, combine the chopped dried cherries, chocolate wafer crumbs, powdered sugar, cocoa powder, melted butter, and vanilla extract. Mix until everything is well combined.
- Once your mixture is thoroughly mixed, pop it in the refrigerator for about 30 minutes. This will make it easier to handle.
- After chilling, scoop about 1 tablespoon of the mixture and roll it into a ball. Repeat this step with the remaining mixture.
- Place the chocolate balls on a parchment-lined baking sheet.
- In a microwave-safe bowl, melt the chocolate chips in 30-second intervals, stirring in between until smooth.
- Dip each chocolate ball into the melted chocolate, allowing any excess chocolate to drip off.
- Roll the coated balls in sprinkles or chopped nuts for decoration.
- Return the decorated balls to the parchment-lined baking sheet and refrigerate until the chocolate coating is set, about 30 minutes.
- Serve chilled or at room temperature and enjoy your festive treat!
Substitutions & Additions
If you want to get creative, here are some fun swaps and additions:
- Use dried cranberries instead of cherries for a different fruit flavor.
- Try adding a pinch of sea salt to the melted chocolate for a delightful contrast.
- Replace chocolate wafer crumbs with graham cracker crumbs for a slightly different texture.
- Add a splash of almond extract instead of vanilla for a nutty twist.
Tips for Success
Here are some helpful tips to ensure your chocolate cherry balls turn out perfectly:
- Make sure to chill the mixture well before rolling, as this prevents it from sticking to your hands.
- Be patient while melting the chocolate; stirring in between helps achieve a smooth consistency.
- If the mixture is too crumbly, a little extra melted butter can help bind it together.
How to Store Christmas Chocolate Cherry Balls
To keep your chocolate cherry balls fresh, store them in an airtight container in the refrigerator. They should last about a week, but I doubt they’ll last that long! You can also freeze them for up to a month—just make sure to separate them with parchment paper to avoid sticking.
FAQs
Can I use fresh cherries instead of dried?
No, fresh cherries will add too much moisture and won’t hold the shape.
Can I make these in advance?
Absolutely! They can be made a few days ahead, making them perfect for holiday gatherings.
What if I don’t have chocolate wafer crumbs?
You can substitute with crushed Oreos or graham crackers for a similar texture.
Are these gluten-free?
Yes, if you use gluten-free chocolate wafer crumbs, they can be gluten-free!
Creating these Christmas Chocolate Cherry Balls is a joyful way to celebrate the season. For more delicious recipes, check out festive treats or easy dessert ideas you will love! And don’t forget to follow our Pinterest for more inspiration!
Christmas Chocolate Cherry Balls
Equipment
- Large Mixing Bowl
- Parchment-lined Baking Sheet
- Microwave-safe Bowl
Ingredients
For the Chocolate Cherry Balls
- 1 cup dried cherries chopped
- 1 cup chocolate wafer crumbs
- 1 cup powdered sugar
- 1/2 cup unsweetened cocoa powder
- 1/4 cup unsalted butter melted
- 1 teaspoon vanilla extract
- 1/2 cup chocolate chips melted (for coating)
- 1/4 cup sprinkles or chopped nuts for decoration
Instructions
- Step 1: In a large mixing bowl, combine the chopped dried cherries, chocolate wafer crumbs, powdered sugar, cocoa powder, melted butter, and vanilla extract. Mix until well combined.
- Step 2: Once the mixture is thoroughly mixed, refrigerate for about 30 minutes to make it easier to handle.
- Step 3: After chilling, scoop about 1 tablespoon of the mixture and roll it into a ball. Repeat with the remaining mixture.
- Step 4: Place the chocolate balls on a parchment-lined baking sheet.
- Step 5: In a microwave-safe bowl, melt the chocolate chips in 30-second intervals, stirring in between until smooth.
- Step 6: Dip each chocolate ball into the melted chocolate, allowing excess chocolate to drip off.
- Step 7: Roll the coated balls in sprinkles or chopped nuts for decoration.
- Step 8: Return the decorated balls to the parchment-lined baking sheet and refrigerate until the chocolate coating is set, about 30 minutes.
- Step 9: Serve chilled or at room temperature. Enjoy your festive treat!