
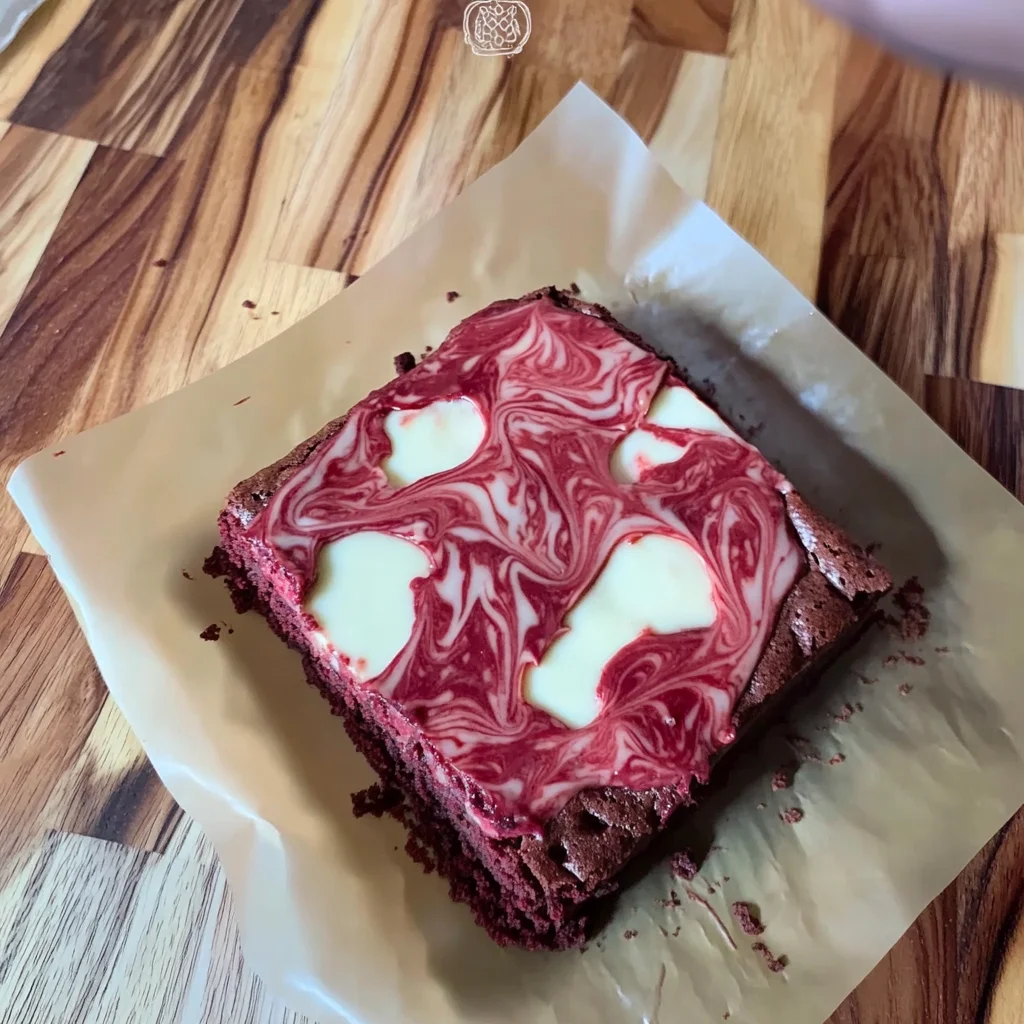
Ah, the memories of special occasions filled with rich desserts! Red velvet cheesecake brownies evoke that sweet nostalgia, don’t they? With their vibrant color and creamy cheesecake swirl, these brownies are not just a treat for the eyes but also a delightful indulgence for your taste buds. Plus, they are incredibly easy to make, meaning you can whip them up quickly for any gathering or just as a cozy treat for yourself!
Why You’ll Love Red Velvet Cheesecake Brownies
- Fast: You can have the main components prepped and in the oven in about 20 minutes.
- Easy: It’s a simple “brown and bake” method that even beginner cooks can master.
- Giftable: This is a sturdy dish that travels well, making it perfect for potlucks or as a “get well soon” meal.
- Crowd-pleasing: Even people who think they don’t like cheesecake usually fall in love with this creamy, fudgy version!
Ingredients
Gather these simple ingredients to create your delicious red velvet cheesecake brownies:
- Brownie Layer:
- 1/2 cup (1 stick) unsalted butter
- 1 cup granulated sugar
- 1 large egg
- 1 teaspoon vanilla extract
- 1 cup all-purpose flour
- 1 tablespoon cocoa powder
- 1/2 teaspoon baking powder
- 1/4 teaspoon salt
- 1 tablespoon red food coloring
- Cheesecake Layer:
- 8 oz cream cheese, softened
- 1/4 cup granulated sugar
- 1 large egg
- 1 teaspoon vanilla extract
How to Make Red Velvet Cheesecake Brownies
- Preheat the oven to 350°F (175°C). Grease and line an 8×8-inch baking pan with parchment paper, leaving an overhang for easy removal.
- In a medium saucepan, melt the butter over low heat. Remove from heat and stir in the sugar, egg, and vanilla extract until well combined.
- In a separate bowl, whisk together the flour, cocoa powder, baking powder, and salt. Gradually add the dry ingredients to the wet mixture, mixing until just combined. Stir in the red food coloring until the batter is evenly colored.
- Pour the brownie batter into the prepared baking pan and spread it evenly.
- In a mixing bowl, beat the softened cream cheese with sugar until smooth. Add the egg and vanilla extract, mixing until well combined.
- Drop spoonfuls of the cheesecake mixture onto the brownie layer. Use a knife or skewer to swirl the cheesecake into the brownie batter for a marbled effect.
- Bake in the preheated oven for 25-30 minutes, or until a toothpick inserted into the center comes out with a few moist crumbs.
- Allow the brownies to cool in the pan for at least 30 minutes before lifting them out using the parchment overhang. Cut into squares and serve. Enjoy!
Substitutions & Additions
If you want to give your red velvet cheesecake brownies a twist, consider these substitutions and additions:
- Use a gluten-free flour blend instead of all-purpose flour for a gluten-free version.
- Add chocolate chips or white chocolate chips into the brownie batter for extra indulgence.
- Try adding a hint of almond extract in place of vanilla for a unique flavor profile.
- Top with crushed nuts or sprinkles before baking to add a delightful crunch!
Tips for Success
Here are some tips to ensure your red velvet cheesecake brownies come out perfectly:
- Make sure your cream cheese is at room temperature for a smooth cheesecake layer.
- Don’t overmix the batter; mix just until combined to keep your brownies fudgy.
- For easy slicing, let the brownies cool completely before cutting.
- If you want to prep ahead, you can make the batter a day in advance and refrigerate it until you’re ready to bake.
How to Store Red Velvet Cheesecake Brownies
To keep your brownies fresh and delicious:
- Store them in an airtight container at room temperature for up to 3 days.
- If you want to keep them longer, refrigerate for up to a week.
- You can also freeze them for up to 3 months. Just make sure to wrap them well to prevent freezer burn!
FAQs
Can I make these brownies without food coloring?
Absolutely! The red food coloring is mainly for visual appeal, so feel free to skip it if you prefer.
What can I serve with red velvet cheesecake brownies?
These brownies are divine on their own, but a scoop of vanilla ice cream or a dollop of whipped cream pairs beautifully!
Can I use low-fat cream cheese?
Yes, you can use low-fat cream cheese, but keep in mind it may slightly affect the creaminess of the cheesecake layer.
For more delicious recipes, check out cake recipes or dessert ideas for treats you will love!
Happy baking, my friend! Don’t forget to share your creations with me on Pinterest!
Red Velvet Cheesecake Brownies
Equipment
- 8x8-inch baking pan
- Medium Saucepan
- Mixing bowl
- Whisk
- Knife or skewer
Ingredients
Brownie Layer
- 1/2 cup unsalted butter 1 stick
- 1 cup granulated sugar
- 1 large egg
- 1 teaspoon vanilla extract
- 1 cup all-purpose flour
- 1 tablespoon cocoa powder
- 1/2 teaspoon baking powder
- 1/4 teaspoon salt
- 1 tablespoon red food coloring
Cheesecake Layer
- 8 oz cream cheese softened
- 1/4 cup granulated sugar
- 1 large egg
- 1 teaspoon vanilla extract
Instructions
- Step 1: Preheat the oven to 350°F (175°C). Grease and line an 8x8-inch baking pan with parchment paper, leaving an overhang for easy removal.
- Step 2: In a medium saucepan, melt the butter over low heat. Remove from heat and stir in the sugar, egg, and vanilla extract until well combined.
- Step 3: In a separate bowl, whisk together the flour, cocoa powder, baking powder, and salt. Gradually add the dry ingredients to the wet mixture, mixing until just combined. Stir in the red food coloring until the batter is evenly colored.
- Step 4: Pour the brownie batter into the prepared baking pan and spread it evenly.
- Step 5: In a mixing bowl, beat the softened cream cheese with sugar until smooth. Add the egg and vanilla extract, mixing until well combined.
- Step 6: Drop spoonfuls of the cheesecake mixture onto the brownie layer. Use a knife or skewer to swirl the cheesecake into the brownie batter for a marbled effect.
- Step 7: Bake in the preheated oven for 25-30 minutes, or until a toothpick inserted into the center comes out with a few moist crumbs.
- Step 8: Allow the brownies to cool in the pan for at least 30 minutes before lifting them out using the parchment overhang. Cut into squares and serve. Enjoy!