Introduction to Make Peanut Butter Balls
Ah, peanut butter balls – a simple yet utterly delightful treat that has charmed its way into the hearts of many. These little bites of heaven are not just a testament to the magical combination of peanut butter and various coatings but also a versatile delight fitting for nearly any occasion. Whether it’s a cozy family gathering, a festive holiday party, or just a regular Tuesday night craving, peanut butter balls are the go-to snack that never disappoints.
The beauty of peanut butter balls lies in their humble beginnings. Originating from the simple desire to create a no-bake dessert that’s both delicious and easy to make, they have evolved into a culinary canvas for creativity. From the classic creamy peanut butter version to the crunchy twist and the decadent chocolate-covered variety, there’s a peanut butter ball for every taste and preference.
But what truly makes these treats a crowd-pleaser is their adaptability. Whether you’re a fan of the rich, melt-in-your-mouth texture, the satisfying crunch that comes with every bite, or that extra layer of chocolatey goodness, there’s a way to tweak and twist the recipe to make it your own. And let’s not forget about the various dietary needs and restrictions – with a bit of creativity, they can be transformed into vegan, gluten-free, or nut-free versions, ensuring everyone gets to enjoy this delightful treat.
So, let’s embark on a culinary journey that promises simplicity, versatility, and, most importantly, deliciousness. Whether you’re a seasoned pro or a first-timer ready to experiment with flavors and textures, the journey to creating the perfect treat is sure to be as enjoyable as the outcome. Stay tuned, as we’re about to unravel the secrets to creating these irresistible treats, complete with tips, tricks, and a sprinkle of culinary magic.
Essential Ingredients to Make Peanut Butter Balls
Diving into the world of these treats, the adventure begins with gathering the right ingredients. A culinary creation that’s both simple and versatile, these treats require just a few key components to start. Whether you’re aiming for the classic creamy delight, the textured crunchy experience, or the luxurious chocolate-covered extravaganza, the foundation of your treats lies in the quality and combination of ingredients you choose.
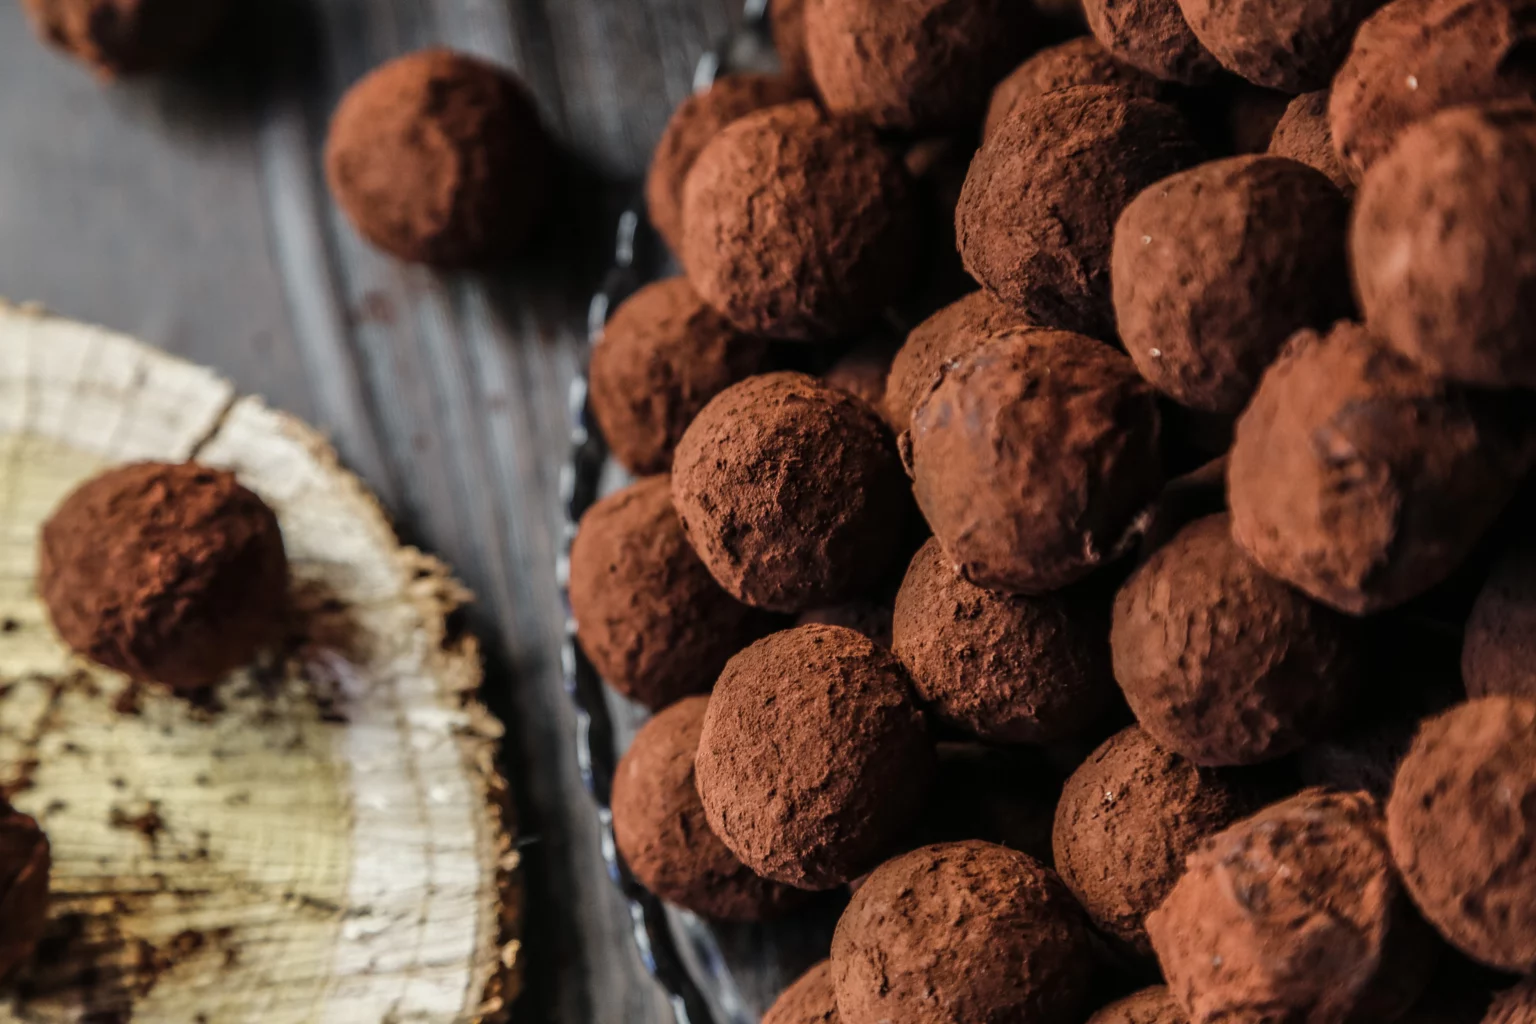
Creamy Version
For those who yearn for that smooth, melt-in-your-mouth texture, the creamy version is your go-to. You’ll need:
- 2 cups (400 g) of peanut butter, offering that rich, nutty base.
- 2 cups (400 g) of honey, adding a natural sweetness that binds the mixture.
- 2 1/6 cups (435 g) of powdered milk, creating the perfect consistency.
- And for the coating, a choice between 2 cups (400 g) of crushed cornflakes, finely chopped walnuts/pecans, or powdered sugar, each offering a unique finish to your treats.
Crunchy Version
If you’re all about that satisfying crunch, the crunchy version will not disappoint. Gather:
- 1 cup (200 g) of crunchy peanut butter, for that bite.
- 1/4 cup (50 g) of margarine or butter, softened to blend smoothly.
- 1 cup (200 g) of powdered sugar, for a touch of sweetness.
- 2 cups (400 g) of Kellogg’s® Rice Krispies® cereal, introducing a playful texture.
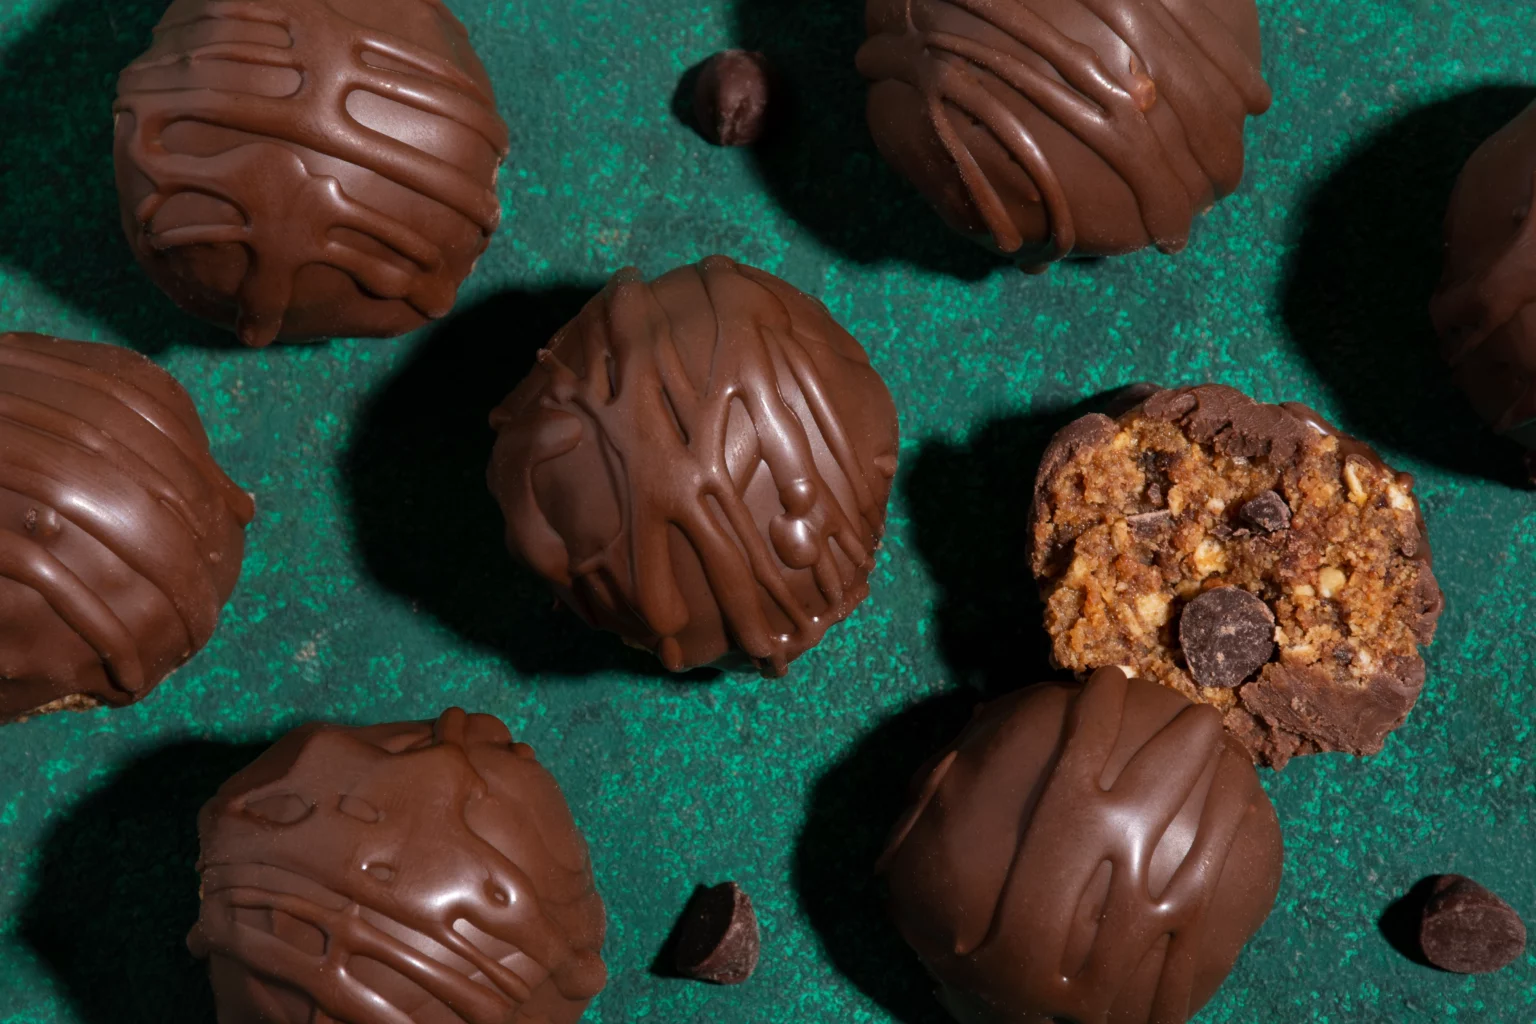
Chocolate Covering
And for those who believe everything is better with chocolate, the chocolate covering is a dream come true:
- 2 cups (400 g) of semisweet chocolate chips, ready to melt into velvety goodness.
- 2 tablespoons (30 g) of vegetable shortening, ensuring a smooth and glossy finish.
Variations and Substitutions
The joy of making these treats lies in the endless possibilities for customization. Dietary restrictions or simply a desire to experiment can lead you to explore various substitutions:
- Vegan? Swap honey for maple syrup and ensure your chocolate chips are dairy-free.
- Gluten-free? Opt for gluten-free Rice Krispies or substitute with crushed gluten-free graham crackers.
- Nut allergies? Sunflower seed butter can be a great alternative, allowing everyone to enjoy these treats worry-free.
By embracing these variations, you can ensure that your treats are not just a treat, but a celebration of diversity and inclusivity, catering to all tastes and dietary needs. So, grab your apron, and let’s get ready to mix, roll, and dip our way to perfection.
Step-by-Step Guide to Make Peanut Butter Balls
Crafting the perfect treats is an art that combines simplicity with a touch of culinary creativity. Whether you’re aiming for the classic creamy texture, the satisfying crunch of the cereal-infused variety, or the decadent chocolate-covered bliss, following these step-by-step instructions will guide you to delicious success.
Making Creamy Version
- Mix Ingredients: In a large bowl, combine 2 cups of peanut butter with 2 cups of honey and 2 1/6 cups of powdered milk. Stir until you achieve a thick, homogenous mixture. This is the base of your creamy treats, rich in flavor and ready to be shaped.
- Shape the Balls: Scoop out small portions of the mixture and roll them into balls about the size of a large walnut. Feel free to adjust the size according to your preference, but remember, the joy of these treats lies in their bite-sized wonder.
- Coat the Balls: Roll each ball in your chosen coating—crushed cornflakes, finely chopped nuts, or powdered sugar. Each option offers a unique texture and flavor, so don’t hesitate to experiment with different coatings to find your favorite combination.
- Refrigerate: Place the coated balls on waxed paper and refrigerate for at least 20 minutes. This step is crucial as it helps the balls firm up, enhancing their texture and making them even more irresistible.
Crafting Crunchy Version
- Combine Base Ingredients: In a large mixing bowl, beat 1 cup of crunchy peanut butter with 1/4 cup of softened margarine or butter and 1 cup of powdered sugar. If you’re doing this by hand, prepare for a mini workout, but the end result is well worth the effort.
- Add the Crunch: Gradually mix in 2 cups of Rice Krispies cereal, ensuring each piece is evenly coated with the peanut butter mixture. The cereal adds a delightful crunch that’s sure to surprise and delight with every bite.
- Form the Balls: Once your mixture is ready, shape it into balls, placing each one in a mini cupcake liner for a festive touch. This step is where you can get creative, adjusting the size to your liking.
- Chill to Set: Refrigerate the balls until they’re firm. This not only helps them hold their shape but also enhances the texture, making the crunch even more enjoyable.
Preparing Chocolate Covering
- Melt Chocolate: In a saucepan, gently melt 2 cups of semisweet chocolate chips with 2 tablespoons of vegetable shortening over low heat. Stir constantly to prevent the chocolate from burning, ensuring a smooth and glossy finish.
- Coat the Balls: Using a fork, dip each ball into the melted chocolate, ensuring an even coating. Let the excess chocolate drip off before placing the balls on waxed paper or back into the cupcake liners.
- Set and Serve: Refrigerate the chocolate-covered balls until the chocolate sets. This final touch not only adds a layer of decadence but also seals in the flavors, making each bite a perfect blend of flavors.
With these steps, you’re well on your way to creating treats that are not just treats but memories waiting to be made. Whether you’re making them for a special occasion or just because, the joy of sharing these homemade delights is unmatched. So, let’s roll up our sleeves and bring some sweetness into our lives, one treat at a time.
Tips and Tricks
Creating the perfect treats is an adventure in flavor and texture. But, like any culinary journey, a few insider tips and tricks can elevate your treats from delightful to divine. Whether you’re a seasoned chef or a first-time maker, these nuggets of wisdom will ensure your treats are the talk of the town.
Achieving the Right Consistency
- Chill the Dough: If you find your mixture too sticky to handle, don’t fret! A quick chill in the refrigerator for about 20-30 minutes can make the dough easier to work with, allowing you to shape your balls with ease.
- Adjust as Needed: Depending on the brand of peanut butter used, you might find the mixture either too dry or too moist. Feel free to adjust by adding a bit more powdered milk or peanut butter to achieve that perfect, moldable consistency.
Storage Advice to Make Peanut Butter Balls
- Airtight is Right: Store your treats in an airtight container to keep them fresh. They can last in the refrigerator for up to two weeks, but let’s be honest, they’re usually gone long before then!
- Freeze for Later: For longer storage, they freeze beautifully. Place them in a single layer on a baking sheet to freeze, then transfer to a freezer bag. They can last for up to 3 months, making them a perfect make-ahead treat for any occasion.
Serving Suggestions
- Room Temperature Perfection: While they are fantastic chilled, letting them sit at room temperature for a few minutes before serving can enhance their flavor and texture, making them even more irresistible.
- Dress to Impress: For an extra touch of elegance, drizzle your chocolate-covered treats with white chocolate or sprinkle them with a dash of sea salt or crushed nuts before the chocolate sets. It’s all about that visual and taste appeal!
Expert Tips to make to Make Peanut Butter Balls
- Quality Matters: The quality of your ingredients plays a significant role in the final outcome. Opt for high-quality peanut butter and chocolate for a richer, more decadent treat.
- Experiment with Flavors: Don’t be afraid to get creative with your coatings and mix-ins. Crushed cookies, cereal, or even a pinch of cinnamon can add an exciting twist to your treats.
- Mind the Size: Keeping your treats uniform in size not only makes them more aesthetically pleasing but also ensures even chilling and coating. A small ice cream scoop or teaspoon can be your best friend in achieving consistency.
By keeping these tips and tricks in mind, you’re well on your way to creating treats that are not just treats but true culinary masterpieces. Remember, the beauty of cooking lies in the joy of experimenting and sharing your creations with loved ones. So, go ahead, let your culinary creativity shine, and make your next batch your best yet!
FAQs to Make Peanut Butter Balls
In the world of these treats, curiosity often leads to innovation. Here are some of the most frequently asked questions that might arise as you embark on your treat-making journey. These insights aim to clarify, inspire, and ensure that your culinary adventure is as smooth as the peanut butter you’re using.
Can I use regular milk instead of powdered milk?
No, regular milk won’t work in place of powdered milk for this recipe. Powdered milk helps to achieve the desired consistency and firmness without adding excess liquid. If you’re looking for a dairy-free alternative, consider coconut milk powder or soy milk powder to maintain the right texture.
How long can you store them?
They can be stored in an airtight container in the refrigerator for up to two weeks. If you’d like to keep them longer, they freeze exceptionally well. Just place them in a single layer on a baking sheet to freeze, then transfer to a freezer-safe bag or container. They can be enjoyed for up to 3 months from the freezer, making them a perfect make-ahead treat.
Can I make these vegan or gluten-free?
Absolutely! For a vegan version, ensure your peanut butter is vegan (most are, but it’s always good to check) and substitute the honey with maple syrup or agave nectar. Use dairy-free chocolate chips for the chocolate covering. For a gluten-free version, ensure your powdered milk (or its substitute) and any additional mix-ins or coatings are gluten-free. Many stores offer gluten-free Rice Krispies and powdered sugar, making it easy to adapt the recipe to your dietary needs.
What can I use instead of peanut butter if I have a nut allergy?
For those with nut allergies, sunflower seed butter is an excellent alternative to peanut butter. It has a similar texture and flavor profile, making it a safe and delicious option. Always ensure that the other ingredients you use are also nut-free, including the chocolate chips and any mix-ins or coatings.
Can I add other ingredients?
Of course! They are incredibly versatile. Feel free to add in your favorite ingredients to customize the flavor. Some popular add-ins include mini chocolate chips, crushed cookies, or even a dash of vanilla extract or cinnamon for an extra layer of flavor. Just be mindful of the consistency of your mixture; you may need to adjust the amounts slightly to accommodate any additional ingredients.
By addressing these FAQs, we hope to have cleared up any uncertainties and sparked even more excitement about making them. Remember, the key to great treats is experimentation and fun, so don’t be afraid to try new things and make the recipe your own. Happy rolling!
Wrapping Up
As we bring our journey through the delightful world of them to a close, it’s clear that these treats are more than just a simple snack. They embody the joy of cooking, the pleasure of sharing, and the endless possibilities that come from combining a few basic ingredients with a dash of creativity. Whether you’re a seasoned pro or a newcomer to the kitchen, the process of making them offers a unique opportunity to explore, experiment, and enjoy.
Reflecting on what we’ve covered, from the essential ingredients and variations to the step-by-step instructions, tips, tricks, and FAQs, it’s evident that they are a versatile and adaptable treat suited for any occasion. They’re a testament to the idea that great things come in small packages, and with a little effort, you can create something truly special that brings joy to those around you.
Encouragement to Experiment with Recipes
One of the most exciting aspects of cooking is the freedom to experiment and make each recipe your own. With their simple base and customizable nature, they are the perfect canvas for culinary creativity. Whether you’re tweaking the ingredients to cater to dietary restrictions, adding unique mix-ins for extra flavor, or playing with coatings for a festive touch, each batch is an opportunity to express yourself and surprise your taste buds.
As you continue to make them, remember to embrace the process and have fun with it. The best recipes often come from a willingness to experiment and learn from each attempt. And who knows? Your next batch could be your best yet, filled with new flavors, textures, and a sprinkle of culinary magic.
Final Thoughts
In closing, we hope this guide has inspired you to roll up your sleeves and dive into the world of peanut butter balls. With their rich flavor, satisfying texture, and endless versatility, they’re sure to become a favorite treat to make and share. So, gather your ingredients, unleash your creativity, and get ready to enjoy the simple pleasure of homemade peanut butter balls. After all, the best moments in life are those shared with friends and family, accompanied by a plate of delicious, handcrafted treats.
Thank you for joining us on this culinary adventure. Happy cooking, and may your peanut butter balls be as delightful to make as they are to eat!