
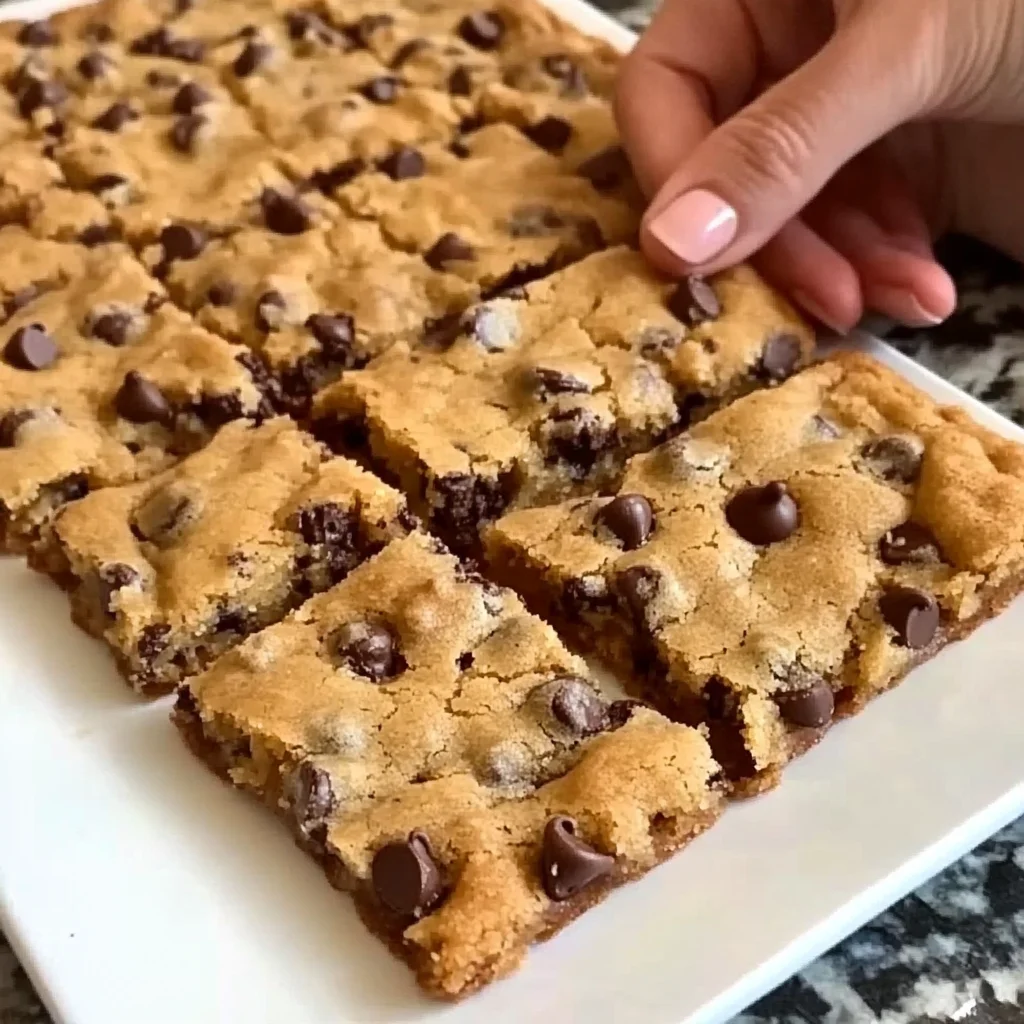
There’s something magical about the smell of fresh chocolate chip cookies wafting through the house. It takes me back to my childhood, where every batch was a delightful occasion. The warm, gooey chocolate chips melting in your mouth, paired with that perfectly soft yet slightly chewy texture, makes this chocolate chip cookies recipe a timeless favorite!
Why You’ll Love Chocolate Chip Cookies
- Fast: You can have the main components prepped and in the oven in about 20 minutes.
- Easy: It’s a simple “brown and bake” method that even beginner cooks can master.
- Giftable: These cookies are perfect for sharing! Package them up for friends or family as a thoughtful gift.
- Crowd-pleasing: Even those with the pickiest of taste buds will enjoy these delicious treats!
Ingredients
- 2 1/4 cups all-purpose flour: This forms the base of your cookies.
- 1/2 teaspoon baking soda: Helps the cookies rise and gives them that perfect texture.
- 1 cup unsalted butter, room temperature: Ensures a creamy mixture and rich flavor.
- 1/2 cup granulated sugar: Adds sweetness and helps the cookies crisp up slightly.
- 1 cup packed light-brown sugar: Gives the cookies a chewy texture and a rich flavor.
- 1 teaspoon salt: Balances out the sweetness perfectly!
- 2 teaspoons pure vanilla extract: Enhances the overall flavor profile.
- 2 large eggs: Binds the ingredients together and contributes to the chewy texture.
- 2 cups semisweet and/or milk chocolate chips: The star of the show! Choose your favorite for a delicious bite.
How to Make Chocolate Chip Cookies
Now, let’s dive into the step-by-step process of creating these delightful cookies!
- Preheat your oven to 350°F (180°C). This is the perfect temperature for baking these cookies.
- In a small bowl, whisk together the flour and baking soda; then set it aside for later.
- In a large bowl, using an electric mixer, cream the room-temperature butter and both sugars on medium speed until the mixture is light and fluffy, about 2 minutes.
- Add the salt, vanilla, and eggs to the mixture; beat until everything is well combined.
- Gradually add your flour mixture, mixing until just combined. Be careful not to overmix here!
- Stir in those luscious chocolate chips until evenly distributed.
- Drop tablespoon-sized balls of dough onto ungreased baking sheets, spacing them about 2 inches apart to allow for spreading.
- Bake until the edges are golden brown, about 10-12 minutes. Keep an eye on them to avoid overbaking!
- Remove from the oven and let cool on the baking sheets for a few minutes before transferring them to wire racks to cool completely.
Substitutions & Additions
If you’re feeling adventurous, there are plenty of ways to customize this recipe! Here are some ideas:
- Swap out all-purpose flour for whole wheat flour for a healthier option.
- Add nuts like walnuts or pecans for an extra crunch!
- Try using dark chocolate chips for a richer flavor.
- Mix in some oats for a chewy texture.
Tips for Success
Here are a few tips I’ve learned along the way to ensure your cookies turn out perfectly:
- Make sure your butter is at room temperature for the best creaming results.
- Don’t skip the chilling step if you’re making the dough ahead of time; it helps the cookies maintain their shape.
- Use a cookie scoop for evenly sized cookies that bake uniformly.
How to Store Chocolate Chip Cookies
To keep your cookies fresh, store them in an airtight container at room temperature. They should last for about a week. If you want to keep them longer, consider freezing them. Simply place the cooled cookies in a freezer-safe bag, and they can last for up to three months!
FAQs
Can I use margarine instead of butter? Yes, but it may alter the flavor slightly. Butter gives the best taste and texture!
What can I do if my cookies spread too much? Try chilling the dough for at least 30 minutes before baking.
Can I make the dough ahead of time? Absolutely! You can refrigerate the dough for up to 3 days or freeze it for up to 3 months.
These chocolate chip cookies are sure to bring joy to your kitchen and smiles to your loved ones. For more delicious recipes, check out my other favorites like classic brownies or oatmeal raisin cookies for treats you will love!
Don’t forget to follow us on Pinterest for more sweet inspiration!

Chocolate Chip Cookies
Equipment
- Oven
- Mixing bowl
- Electric Mixer
- Baking sheets
Ingredients
For the Chocolate Chip Cookies
- 2 1/4 cups all-purpose flour This forms the base of your cookies.
- 1/2 teaspoon baking soda Helps the cookies rise and gives them that perfect texture.
- 1 cup unsalted butter room temperature, ensures a creamy mixture and rich flavor.
- 1/2 cup granulated sugar Adds sweetness and helps the cookies crisp up slightly.
- 1 cup packed light-brown sugar Gives the cookies a chewy texture and a rich flavor.
- 1 teaspoon salt Balances out the sweetness perfectly!
- 2 teaspoons pure vanilla extract Enhances the overall flavor profile.
- 2 large eggs Binds the ingredients together and contributes to the chewy texture.
- 2 cups semisweet and/or milk chocolate chips The star of the show! Choose your favorite for a delicious bite.
Instructions
- Step 1: Preheat your oven to 350°F (180°C). This is the perfect temperature for baking these cookies.
- Step 2: In a small bowl, whisk together the flour and baking soda; then set it aside for later.
- Step 3: In a large bowl, using an electric mixer, cream the room-temperature butter and both sugars on medium speed until the mixture is light and fluffy, about 2 minutes.
- Step 4: Add the salt, vanilla, and eggs; beat until everything is well combined.
- Step 5: Gradually add your flour mixture, mixing until just combined. Be careful not to overmix here!
- Step 6: Stir in those luscious chocolate chips until evenly distributed.
- Step 7: Drop tablespoon-sized balls of dough onto ungreased baking sheets, spacing them about 2 inches apart to allow for spreading.
- Step 8: Bake until the edges are golden brown, about 10-12 minutes. Keep an eye on them to avoid overbaking!
- Step 9: Remove from the oven and let cool on the baking sheets for a few minutes before transferring them to wire racks to cool completely.