Introduction to Cheesy Garlic Chicken Wraps
Cheesy Garlic Chicken Wraps are a mouthwatering, quick-to-make meal that combines the rich flavors of garlic, juicy chicken, and gooey melted cheese. Wrapped in soft flour tortillas and toasted to perfection, these wraps are crispy on the outside and oozing with cheesy goodness on the inside. Ideal for lunch, dinner, or even a quick snack, these wraps are versatile, satisfying, and packed with flavor. With just 25 minutes from start to finish, they’re the perfect solution for busy weeknights or a quick meal on the go!
Table of Contents
- Introduction to Cheesy Garlic Chicken Wraps
- Ingredients Breakdown
- Step-by-Step Directions
- Nutritional Benefits of Cheesy Garlic Chicken Wraps
- Tips for the Perfect Wrap
- Creative Variations
- How to Store and Reheat Leftovers
- Best Occasions to Serve Cheesy Garlic Chicken Wraps
- Frequently Asked Questions (FAQs)
- Conclusion
1. Introduction to Cheesy Garlic Chicken Wraps
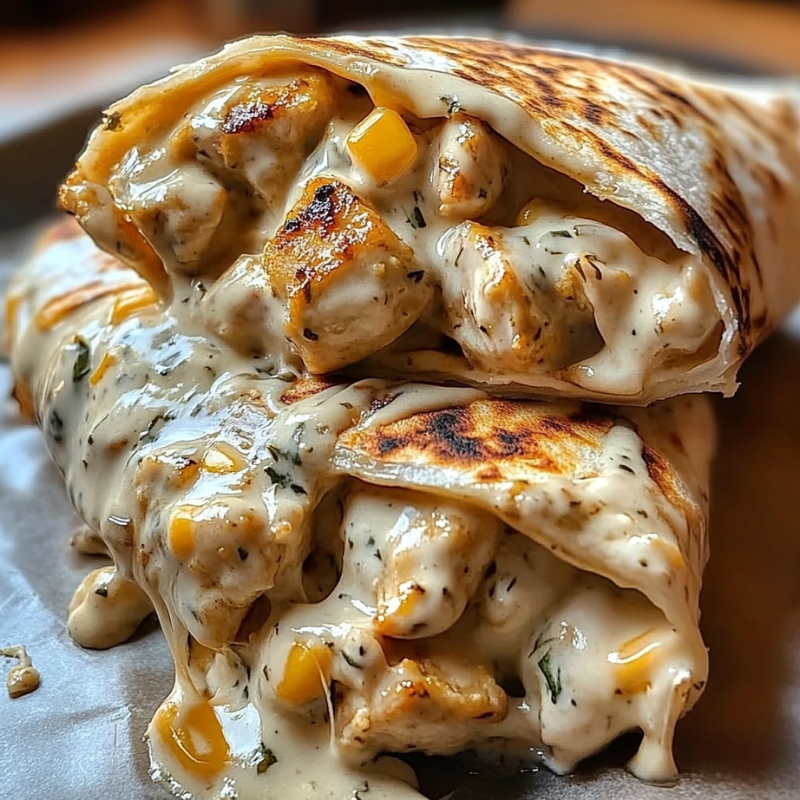
Cheesy Garlic Chicken Wraps are an easy yet delicious meal that features tender chicken, a creamy garlic sauce, and a melty cheese blend. Wrapped in a golden, toasted tortilla, these wraps offer a perfect combination of textures and flavors. The simplicity of the ingredients, like shredded cheddar, mozzarella, and a garlic-infused sauce, ensures that this meal is both satisfying and full of bold, cheesy, and garlicky flavors. Whether you’re serving them for a family dinner or packing them for lunch, these wraps are sure to be a hit!
You can read : Green Bean and Potato Casserole Recipe
2. Ingredients Breakdown
For the Chicken:
- Chicken Breasts (2, cubed): Provides lean protein, making these wraps hearty and filling.
- Olive Oil (1 tbsp): Adds healthy fats and ensures the chicken cooks to a golden brown.
- Garlic Powder (½ tsp): Enhances the garlic flavor, adding depth to the chicken.
- Onion Powder (½ tsp): Adds a subtle sweetness and savory flavor.
- Salt and Pepper (to taste): Seasons the chicken, enhancing all the flavors.
- Fresh Garlic (2 cloves, minced): Offers a fresh, strong garlic kick to the chicken and sauce.
For the Garlic Sauce:
- Sour Cream (¼ cup): Adds creaminess and a tangy flavor to the garlic sauce.
- Mayonnaise (¼ cup): Contributes richness and smoothness, balancing the sauce.
- Fresh Garlic (2 cloves, minced): Enhances the garlic flavor, giving the sauce a fresh, bold taste.
- Fresh Parsley (2 tbsp, chopped): Brightens the sauce with fresh, herbal notes.
For the Wraps:
- Shredded Cheddar Cheese (½ cup): Provides a sharp, tangy flavor that pairs perfectly with the garlic.
- Shredded Mozzarella Cheese (½ cup): Adds a melty, creamy texture.
- Large Flour Tortillas (4): The perfect vehicle for the chicken and cheesy filling, offering a soft, pliable wrap.
You can read : Pineapple Chicken and Rice Recipe
3. Step-by-Step Directions
Step 1: Cook the Chicken
- Heat 1 tbsp of olive oil in a skillet over medium heat.
- Add the cubed chicken, garlic powder, onion powder, salt, and pepper.
- Sauté for 6-8 minutes, or until the chicken is fully cooked and golden brown. Remove from heat and set aside.
Step 2: Make the Garlic Sauce
- In a small bowl, combine ¼ cup sour cream, ¼ cup mayonnaise, 2 cloves minced garlic, and 2 tbsp fresh parsley.
- Stir well to blend the flavors together, then set aside.
Step 3: Assemble the Wraps
- Lay the 4 tortillas flat on a clean surface.
- Evenly divide the cooked chicken between the tortillas, placing it in the center.
- Sprinkle ½ cup shredded cheddar cheese and ½ cup shredded mozzarella cheese over the chicken.
- Drizzle the prepared garlic sauce over the cheese and chicken.
Step 4: Wrap and Toast
- Fold the sides of each tortilla over the filling and roll them tightly into wraps.
- Heat a clean skillet over medium heat and place the wraps seam-side down in the skillet.
- Toast each wrap for 2-3 minutes on each side until the tortillas are golden and crispy, and the cheese is melted.
Step 5: Serve
- Cut the wraps in half and serve warm. Enjoy!
You can read : Hearty Cabbage Soup
4. Nutritional Benefits of Cheesy Garlic Chicken Wraps
- High in Protein: The chicken breasts provide a good source of lean protein, supporting muscle repair and growth.
- Rich in Calcium: Both cheddar and mozzarella cheese are excellent sources of calcium, supporting bone health.
- Healthy Fats: The use of olive oil and mayonnaise adds healthy fats that help keep you feeling full and energized.
- Garlic Benefits: Fresh garlic offers various health benefits, including boosting the immune system and having anti-inflammatory properties.
5. Tips for the Perfect Wrap
- Don’t Overstuff the Wrap: Overfilling the tortilla can make it hard to wrap and prevent it from crisping properly. Keep the filling moderate.
- Use Fresh Tortillas: Fresh, pliable tortillas are easier to wrap and won’t tear when folded.
- Toast Gently: Use medium heat to toast the wraps, allowing them to crisp up slowly while the cheese melts perfectly inside.
- Make it Extra Cheesy: If you love cheese, feel free to add more cheddar or mozzarella for an even cheesier wrap!
6. Creative Variations
- Buffalo Chicken Wraps: Add buffalo sauce to the chicken and replace the garlic sauce with ranch dressing for a spicy twist.
- Vegetarian Wraps: Swap the chicken for roasted vegetables like bell peppers, zucchini, and mushrooms, and keep the rest of the recipe the same.
- Spicy Wraps: Add chopped jalapeños to the chicken or mix hot sauce into the garlic sauce for a spicy version.
- Bacon Ranch Wraps: Add cooked, crumbled bacon and replace the garlic sauce with ranch dressing for a bacon-lovers’ version.
7. How to Store and Reheat Leftovers
Storing:
- Store any leftover wraps in an airtight container in the refrigerator for up to 3 days.
Reheating:
- To reheat, place the wraps in a skillet over medium heat for 2-3 minutes per side until warmed through and crispy. You can also reheat them in the oven at 350°F (175°C) for about 10 minutes.
8. Best Occasions to Serve Cheesy Garlic Chicken Wraps
- Weeknight Dinners: These wraps are quick and easy, making them perfect for busy weeknights.
- Lunch on the Go: Wrap them in foil or plastic wrap and take them to work or school for a delicious packed lunch.
- Game Day Snacks: Cut the wraps into smaller pieces and serve them as finger food at your next game-day gathering.
- Family Meals: Serve these wraps with a side salad or fries for a complete family-friendly dinner.
You can read : Philly Cheesesteak Pasta Recipe
9. Frequently Asked Questions (FAQs)
1. Can I use a different type of cheese?
Yes, you can use any cheese you like. Monterey Jack, pepper jack, or Colby cheese would work well as substitutes.
2. Can I make this recipe gluten-free?
Yes, simply use gluten-free tortillas to make the wraps gluten-free.
3. Can I grill the wraps instead of toasting them in a skillet?
Absolutely! Grilling the wraps will give them a delicious smoky flavor. Just be sure to watch them closely so they don’t burn.
4. Can I make these wraps ahead of time?
Yes, you can prepare the wraps ahead of time and store them in the fridge. Toast them in a skillet right before serving for best results.
5. How can I make these wraps healthier?
You can make the wraps lighter by using Greek yogurt instead of mayonnaise in the garlic sauce and choosing whole-wheat or low-carb tortillas.
10. Conclusion
Cheesy Garlic Chicken Wraps are a quick, easy, and flavorful meal that’s perfect for any occasion. With tender, seasoned chicken, melted cheese, and a rich garlic sauce all wrapped in a crispy tortilla, these wraps deliver on taste and texture. Whether you’re preparing them for a family dinner, packing them for lunch, or serving them at a party, they’re guaranteed to be a hit. Best of all, they’re customizable with endless variations, making them a versatile dish that you can make your own. Enjoy!
You May Like :

Cheesy Garlic Chicken Wraps
Ingredients
- For the Chicken:
- Chicken Breasts 2, cubed: Provides lean protein, making these wraps hearty and filling.
- Olive Oil 1 tbsp: Adds healthy fats and ensures the chicken cooks to a golden brown.
- Garlic Powder ½ tsp: Enhances the garlic flavor, adding depth to the chicken.
- Onion Powder ½ tsp: Adds a subtle sweetness and savory flavor.
- Salt and Pepper to taste: Seasons the chicken, enhancing all the flavors.
- Fresh Garlic 2 cloves, minced: Offers a fresh, strong garlic kick to the chicken and sauce.
- For the Garlic Sauce:
- Sour Cream ¼ cup: Adds creaminess and a tangy flavor to the garlic sauce.
- Mayonnaise ¼ cup: Contributes richness and smoothness, balancing the sauce.
- Fresh Garlic 2 cloves, minced: Enhances the garlic flavor, giving the sauce a fresh, bold taste.
- Fresh Parsley 2 tbsp, chopped: Brightens the sauce with fresh, herbal notes.
- For the Wraps:
- Shredded Cheddar Cheese ½ cup: Provides a sharp, tangy flavor that pairs perfectly with the garlic.
- Shredded Mozzarella Cheese ½ cup: Adds a melty, creamy texture.
- Large Flour Tortillas 4: The perfect vehicle for the chicken and cheesy filling, offering a soft, pliable wrap.
Instructions
- Step 1: Cook the Chicken
- Heat 1 tbsp of olive oil in a skillet over medium heat.
- Add the cubed chicken, garlic powder, onion powder, salt, and pepper.
- Sauté for 6-8 minutes, or until the chicken is fully cooked and golden brown. Remove from heat and set aside.
- Step 2: Make the Garlic Sauce
- In a small bowl, combine ¼ cup sour cream, ¼ cup mayonnaise, 2 cloves minced garlic, and 2 tbsp fresh parsley.
- Stir well to blend the flavors together, then set aside.
- Step 3: Assemble the Wraps
- Lay the 4 tortillas flat on a clean surface.
- Evenly divide the cooked chicken between the tortillas, placing it in the center.
- Sprinkle ½ cup shredded cheddar cheese and ½ cup shredded mozzarella cheese over the chicken.
- Drizzle the prepared garlic sauce over the cheese and chicken.
- Step 4: Wrap and Toast
- Fold the sides of each tortilla over the filling and roll them tightly into wraps.
- Heat a clean skillet over medium heat and place the wraps seam-side down in the skillet.
- Toast each wrap for 2-3 minutes on each side until the tortillas are golden and crispy, and the cheese is melted.
- Step 5: Serve
- Cut the wraps in half and serve warm. Enjoy!